I took these items from Censational Girl's Blog, and believe them to be very accurate. I would love to share with my friends tips on how to take the best possible pictures.
1. Invest in a Good Camera
1. Invest in a Good Camera
I’ve read a few posts here and there from bloggers who use a regular point-and-shoot camera, and yes, I do believe a more basic model has the ability to take a really good picture. However, a good SLR digital camera with variable settings (F-stop, shutter speed, ISO sensitivity, white balance, etc.) is the best ticket to high quality interior photography simply because it allows the user to manipulate the amount of light that enters the lens. And if one thing is true, a great interior shot is all about proper light.
Both Nikon and Canon offer excellent choices, personally I use a Nikon D90 and I stick mostly with two lenses, my 18-55 mm lens (the standard one that came with the camera) for close ups and a Tamron 10-24 mm lens for larger room shots. A great camera will do most of the work for you, so I consider it a worthy investment.
2. Read Your Manual and Get Intimate with Your Camera
The ability to manipulate your camera’s light settings makes all the difference in the world in less than perfect light conditions, especially when shooting interiors or capturing detail shots. Each camera is slightly different, so get up close and personal with yours and learn where all of the settings are to prepare you for manipulating your captures.
It can feel overwhelming at first especially since most manuals are written in technical terms and your eyes can quickly glaze over with all the language. Don’t try to absorb it all at once. Start small and learn how to change the focus mode or image quality one day, then add to your knowledge a little at a time as you play with your settings.

3. Learn the Exposure Triangle
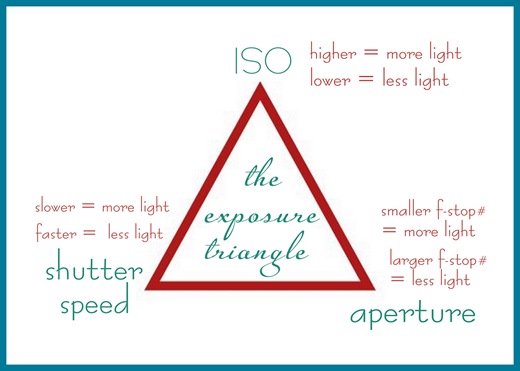
Studying your manual will teach you about the three ways to pull light into your lens when you’re taking your picture and the natural light is not enough. These include 1) widening your aperture, 2) slowing your shutter speed, and 3) increasing your ISO sensitivity.
Ack, what the heck? I know, these are slightly intimidating concepts at first, but you’ll be surprised when you apply yourself that you will be able to understand the basic formula with just a little memorization and practice. You’ll have that moment where the light bulb in your head goes on and you’ll finally get the concept of manipulating light in manual mode ~ it’s a really great feeling!
Here are the basics:
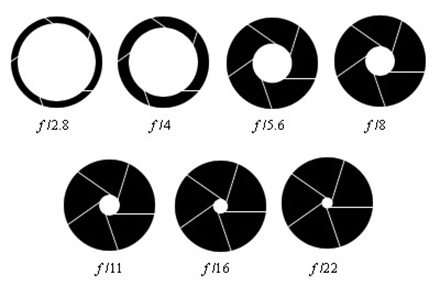
Aperture: the aperture is the width of the opening of your lens and it is measured numerically in what are called f-stops (f/4, f/5.6, f/8, etc). Your camera will list them for you as you rotate the proper dial up and down.What’s important to know: A lower numerical f-stop translates to a wider aperture which means the opening is bigger and more light will enter the lens. Lowering (or widening) your f-stop also decreases depth of field which results in a blurrier background but it will definitely brighten your image (great for detail shots).Increasing the number of your f-stop decreases the size of the aperture which reduces the amount of light that enters the lens but also increases depth of field (ideal for larger room shots).With aperture, you’ll notice the number and size equation actually works in reverse. A lower numerical f-stop equals a larger amount of light, and a higher f-stop equals less amount of light entering the lens. Think of it like your pupils, which get larger in dark environments and smaller in bright sunlight. It’s the same with aperture, you need a wider aperture (or bigger pupil) in low light situations (wider = lower number) and a smaller aperture in bright light (smaller = higher number).Shutter Speed: the shutter speed is the numerical representation of your exposure time. In other words it’s the measurement of how long your lens is open when you take your picture.What’s important to know: A slower shutter speed allows more light to enter your lens in darker environments as the sun sets or on cloudy days. However a slower (or lower) shutter speed (especially below 1/10) can make your shot blurry because your lens is open longer, so it’s best to stabilize your camera on a still surface or with a tripod (see below).With interiors, you can work with slow shutter speeds, but when shooting people in action you’ll end up with blur. But since this is an article about interiors, and not action shots, always consider you do have that added option of slowing the shutter speed to 1/10 or below to allow more light to enter the lens because your subject isn’t moving.ISO Sensitivity: this is your camera’s sensitivity to light which varies depending on your camera from 100 to 1600 or higher depending on the camera.The higher the ISO setting, the more sensitive your camera is to light. A higher ISO translates to a brighter image, however a higher ISO leads to grainier or ‘noisy’ images so it’s best to keep your ISO as low as possible, typically under 1000.
These are the three ways I always use to manipulate my camera when snapping images of rooms or projects. If I need more light, I simply widen (or lower) my f-stop, decrease my shutter speed, and/or up the ISO.
4. Apply the Rule of Thirds
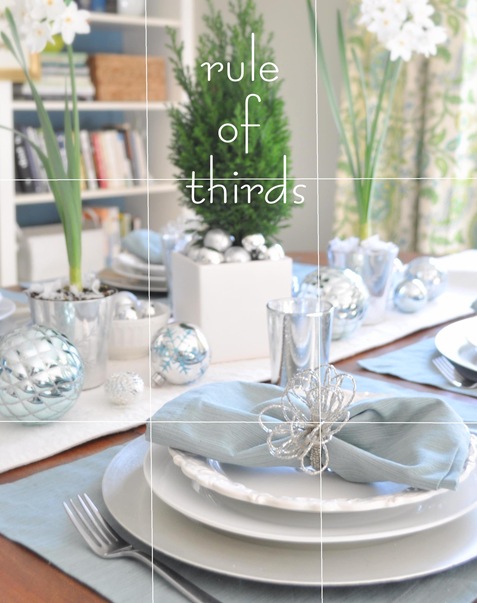
This is a basic photography trick for composing more dynamic or interesting images. I don’t always use this rule, but I do find it works for more mid to close up shots of a subject. Think of it this way, every time you compose an image through your lens (or crop it with basic photo editing), split the image in thirds from top to bottom and left to right. In other words, imagine a tic tac toe grid on top of the photo and simply place your subject on or in one of the four intersecting points.
When you consider this formula when composing an image, you’ll often end up with a more dynamic shot. Take for example this recent tablescape. I chose the napkin ring as the focal point and weighted it so that the napkin ring appears in the bottom right intersecting point of the grid.
The result is a well composed attractive image.
5. Capture Interiors in the Best Light
If you want to show off your project or space in the very best way you must shoot it in the best light. Ideally, that’s a sunny day with all your blinds open allowing for the most natural light, but in winter or late afternoon, your light is often compromised. Knowing your best lighting conditions is key.
For us DIY and home bloggers, this means you should plan ahead and shoot your subject when your lighting is best and brightest, whatever time that is in the space you’re capturing (late morning or early afternoon).
6. Turn Off the Flash
I haven’t used a flash indoors in years, instead I’ve learned to manipulate the light that comes into the camera’s lens. The flash can be useful outdoors, or late at night, but 99 times out of 100, using the flash indoors will not produce a pleasing image. I know there are some fancy flashes that you can manipulate that don’t blast your subject, but I don’t own any of those yet. For now, I stick to the ‘only shoot interiors in daylight’ rule which is trickier in winter but I still plan accordingly.
7. Snap from a Different Perspective
Some of the most interesting images are taken from somewhere other than eye level. Try standing above, getting down below, or zooming in close when capturing your subject for a more artistic shot. Experiment and play, that’s how you improve. You’d be surprised how interesting a subject becomes behind a lens when you think beyond eye level.
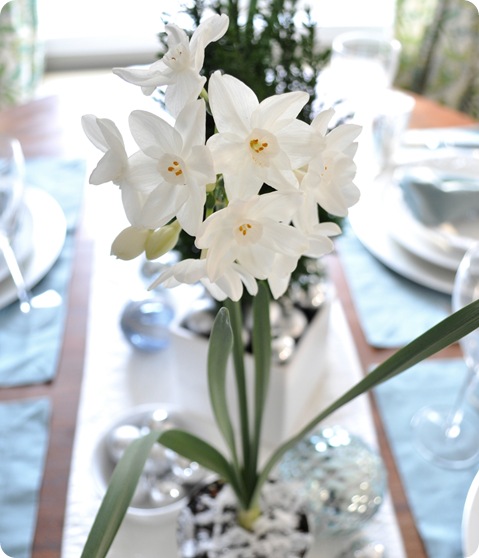
settings: f-stop 4.0 shutter speed 1/10 ISO 400
8. Stabilize
It’s important when shooting interiors to be able to stabilize the camera indoors especially with lower shutter speeds as mentioned above.
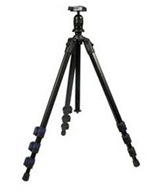 Sometimes I’ll use just a stack of books or a stepladder to hold my camera still. Mostly I use my tripod which is a versatile lightweight ProMaster Featherweight 23T that cost me $90.
Tripods range in price, but I recommend skipping the cheap ones you see at Walmart and spending the extra dollars for a decent one from a photography shop, which you can pick up for around $80 to $120.
. .
9. Take a lot of Pictures and in High Resolution
I’m never satisfied with just one and I’m rarely satisfied with ten images of the same thing. Typically I’ll shoot 150-300 pictures of one single scene. I fire away at different f-stops, shutter speeds, and angles and will often take away only ten worthy images from a collection of 300.
I also shoot in high resolution, above 2000 px per image. This is especially important for magazines or websites that contact you and want to use your images, they always want high resolution pictures. Many advanced or professional photographers shoot in RAW (I rarely do) but that’s useful if you’re using Photoshop or Adobe Lightroom to edit. I simply up the resolution on my camera settings and use a high GB memory card. I also delete the images I don’t need once I’m done so they don’t take up precious space on my computer.
.
10. Simple Photo Editing
As you improve with your skills, you’ll see that often the camera takes a perfect shot because you got the light and settings just right, and sometimes you’re left wanting more. I tend to like less saturated and whiter, brighter images so sometimes I’ll pull my picture into a photo editing program to tweak the exposure if necessary.
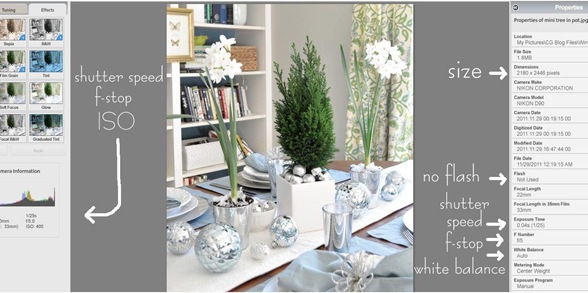
There are several programs available that will give your image that extra boost you need. Picnik, Picasa, and Photoshop Editor are all free, I like the first two just because they’re so user friendly, especially Picasa because you don’t need an internet connection to use it once it’s installed on your computer. I also like Picasa because it will tell you at what settings you captured your image, so it’s educational for those of us still experimenting with manual settings.


No comments:
Post a Comment